

Landscapes have always been a popular photography subject. Here are 5 landscape photo tips to help improve your Landscape photos:
Use a Tripod!
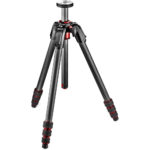 This tip will help not just because a tripod is good, but all 4 of the other tips will rely on a tripod for maximum effectiveness as well. Tripods are a pain to carry around, I get it, but if you are not using a tripod you are not getting the sharpest images your camera and lens can capture. Make sure when you purchase a tripod that you get a good quality one. Buying a cheap tripod is almost useless as they do not offer solid support. One of the most important points of using a tripod is to prevent camera movement during the exposure.

Stop down around f/8 to f/11
Aperture controls depth of field, and most landscapes will benefit from more depth of field. However, stopping down below f/11 or f/16 can actually rob sharpness from your image due to a phenomenon known as “Diffraction”. When your aperture is closed down too much the image can take on a slightly hazy effect (so subtle that it wont look hazy, but it robs sharpness all the same). There is an old photographers saying, “f/8 and be there”. I usually shoot my landscapes in aperture priority mode (A or Tv on the camera mode dial), set my ISO to 100 for maximum image quality
Focus 1/3 of the way into the scene
Ideally, using hyperfocal distance or a “Depth of Field” calculator/app can help ensure your scene is properly focused. However, many lenses do not have “hyperfocal distance” markings, and many lenses may not even have a distance scale on them. By focusing about 1/3 into your scene you will generally be close enough to where hyperfocal distance is measured and it can be much easier to focus at this point rather than relying on a distance scale that may not be very accurate or marked at the exact distance you need.
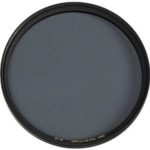
Use a Polarizing Filter
I love polarizing filters for a lot of reasons, but landscape photography is where they really excel. Most photographers use them to enhance the blue skies, but polarizers will also help the tru color of foliage come out in your photos and they will also cut out the glare on non-painted metallic surfaces. And for a bonus they will overcome a slight amount of haze in the atmosphere.
Use a bubble level
Keeping your images level and the horizon straight is a challenge, especially when you are composing through a small viewfinder. using a bubble level will help to ensure your horizon stays straight and level. These are best used with a tripod since it is pretty much impossible to compose with your eye to viewfinder and the bubble level sitting on top in your hot shoe. Some cameras feature a built-in level and if yours is one, be sure to use that.
Bonus Tips
Shoot at your camera’s base ISO
As mentioned above, set your camera’s ISO to it’s lowest base ISO. Some cameras such as the Canon EOS 6D have an extended ISO of 50, but it is not a true ISO 50, but instead it is an overexposure of an ISO 100 exposure than it then processed to compensate. I don’t use ISO 50 even though my favorite film was Fuji Veliva 50.
Use a remote shutter release
Due to the smaller aperture, lowest ISO and the polarizer filter all contributing to a longer shutter speed for a proper exposure, using a remote shutter release will help to ensure your camera does not move. Pressing the shutter button can induce a slight amount of camera shake that can lead to a blurry image. If you don’t have a remote release, using your self timer can help as well.
Use the Mirror Lock-up
some cameras include a feature known as “Mirror lock up”. What this mode does is pre fire the mirror when you press the shutter button intially, and then opens the shutter when you press the button again. When the mirror flips up for the exposure this can lead to a slight vibration in the camera. by locking the mirror up and waiting a few seconds you eliminate this vibration that can cause a slight blur in your images. For best results use a remote shutter release to ensure no external movement in your camera.