
I love to photograph lightning, but it is one of the hardest subjects I shoot. It seems like most of the time the storm has either ended or moved away when I get to a shooting location. I feel like I’m chasing the pot of gold at the end of the rainbow.
Safety First!
Before I start this teaching point on how to photograph lightning I want to remind you that lightning is extremely dangerous. There is no such thing as a “safe” place to observe lightning. If you can see lightning, even if it appears to be more than 10 or even 20 miles away, you can still be potentially struck by lightning. Lightning strikes can be lethal or cause permanent damage, so if you want to be crazy like me, as my wife thinks, be very careful and be sure to visit The National Weather Service for lightning safety tips.
How to Photograph Lightning
Ok, now that we have the basic safety out of the way, let’s talk about how to photograph lightning.

Camera Settings:
Camera: Canon EOS 6D
Lens: Canon EF 28-135mm f/3.5-5.6 IS USM
Focal length: 28mm
Exposure Mode: Manual
Shutter Speed: 30-seconds
Aperture: f/8
ISO: 125
White Balance: Daylight
Image Quality: Raw
Focus Mode: Manual
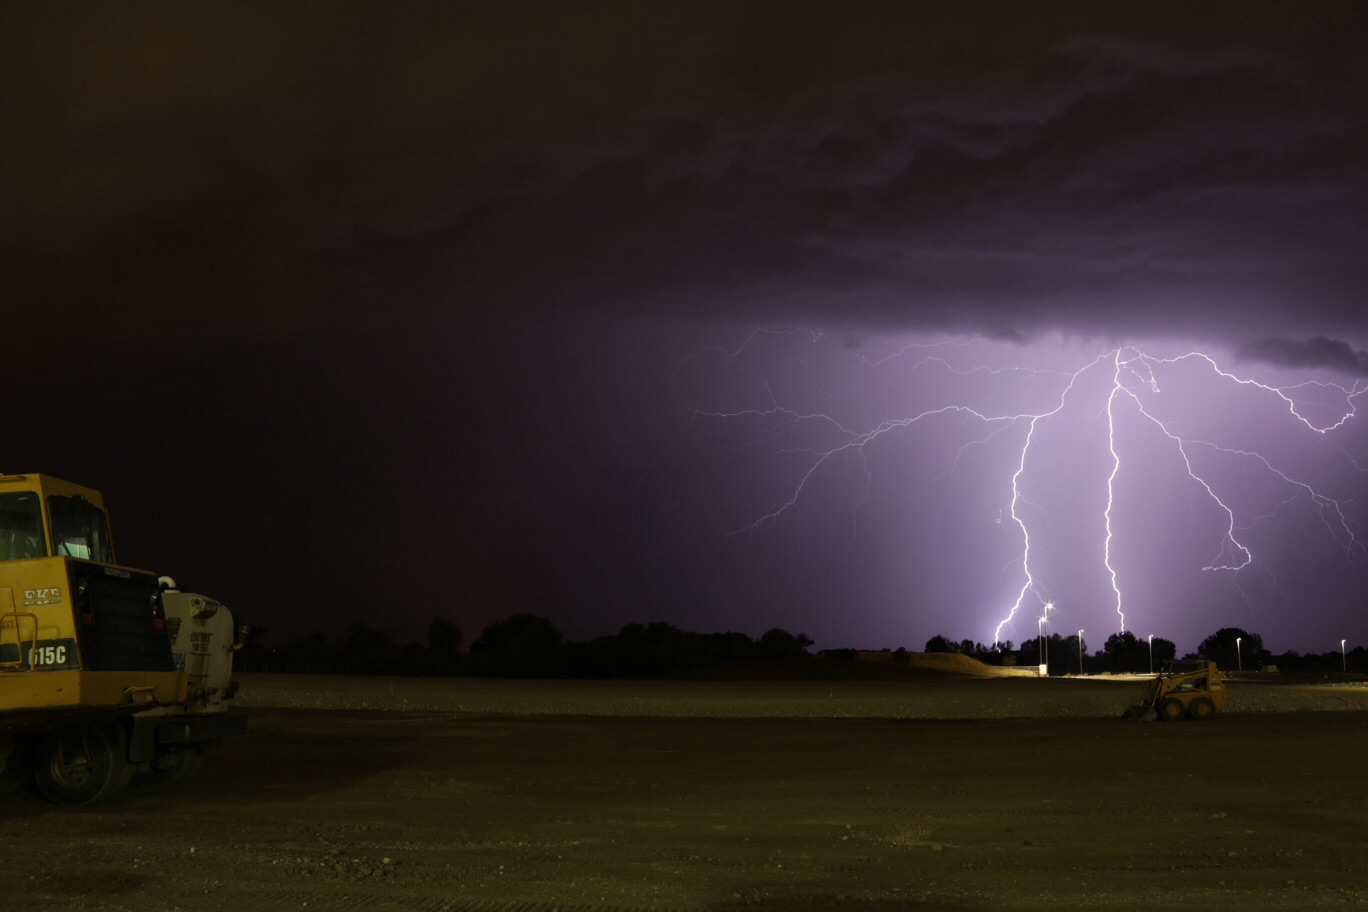
Let’s start by choosing a location. You want to find an area with an unobstructed view of the lightning and, if possible, the horizon as well. Make sure you are somewhere you are not in traffic like the side of the road. Including an interesting foreground element will help to make your photo stand out even more. It pays to scout out potential locations during daylight before a storm. I have a few “go to” spots that I like to use, but I am always looking for new locations as well.
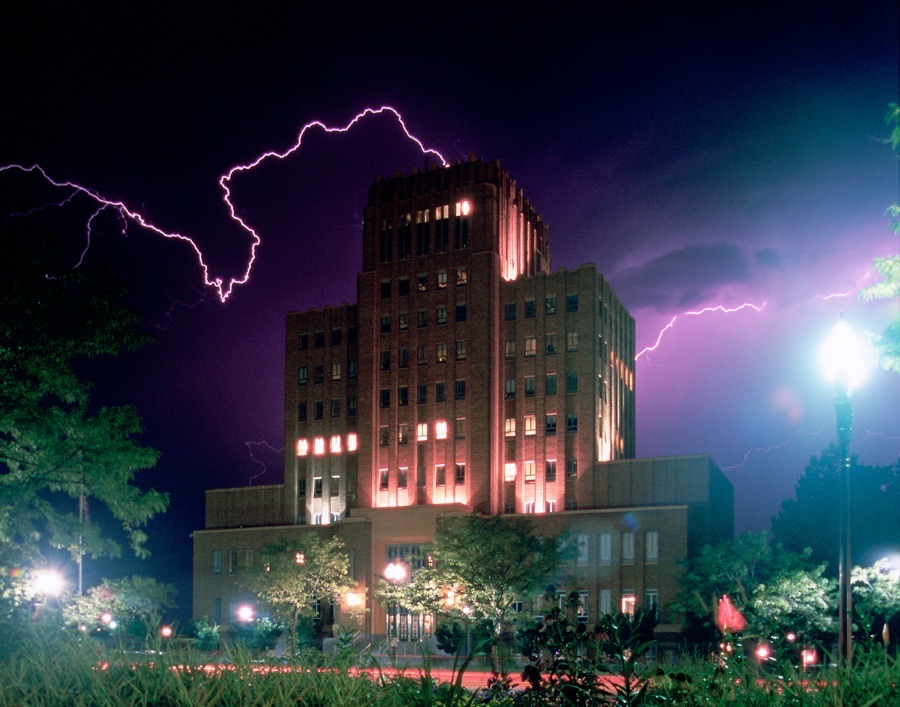 Use a GOOD Tripod! If you use a cheap tripod you will risk camera movement from the wind blowing. The slightest camera movement will cause your images to lack sharpness and can make what would be a great shot into just an OK photo. Several years ago I shot this image, and at small sizes it looks awesome, but when blown up to 11×14 or larger it lacks sharpness and detail. It’s a shame, too because this is likely a once in a lifetime shot. It was after this shot that I decided to invest in good quality tripods from that point forward.
Once you are at your location you will want to aim your camera in the direction of the lightning. Since lightning is not predictable, I like to use a wide angle lens and shoot in the landscape orientation to maximize my chances of getting a picture of a strike.
Set your camera to manual exposure mode. I like to try and shoot with a 30-second exposure, the longer the shutter is open the better your chances of getting a lightning strike. If you are in an area with lights in the foreground you may have to choose shorter shutter speeds. For my aperture I like to start out at F/8 and adjust as needed. If the lightning is too bright you will need to close down your aperture, if it is not bright enough open up the aperture. Finally for best results I like to shoot at or near my base ISO of 100. I use my ISO to balance my exposure. In the above photo I ended up using ISO 125 to help get the lightning a little brighter.
Once you have your exposure set, make sure your white balance is set to daylight. Lightning is very neutral in color and if you use auto white balance your results may not be to your liking. I also like to shoot in Raw to make sure I retain as much highlight detail as possible. See my Raw vs Jpg real World Example photography tip for the difference between Raw and Jpg.
Set your camera to manual focus and focus at or near infinity. You may need to experiment with this and fine tune your focus. After you get a picture with a lightning strike, review it and zoom in all the way and make sure your lightning is sharp. If it is not, your lightning pictures will not be as impressive since the lightning is the main subject. Ideally you want to focus so that the lightning in the background and the foreground details are sharp. You can use Hyperfocal distance for this, but I find that for lightning if I focus using Hyperfocal distance I’m not as happy with the lightning sharpness.
Once your camera is all set, use a wireless remote shutter release and hit the shutter and wait. You may take hundreds of images and only capture a handful of strikes. It’s a lot like fishing, you cast your line, reel it in, and cast again.
Night time is the easiest to capture lighting since it is dark you can use a 30-second shutter speed, but if you want to capture lighting in daylight, be prepared for an even lower keeper rate. You shutter speed will increase to 1/30 or 1/15 second, making capturing lighting much more difficult. There are devices that can sense lightning and trigger your camera, but they can miss since lightning can sometimes happen so fast that it misses. The best units are very expensive and I have never actually tried one. I prefer to shoot at night when it’s not only easier, but I think the images look cooler as well.
Good luck and be careful!
Have a question or comment? Use the comment section below.